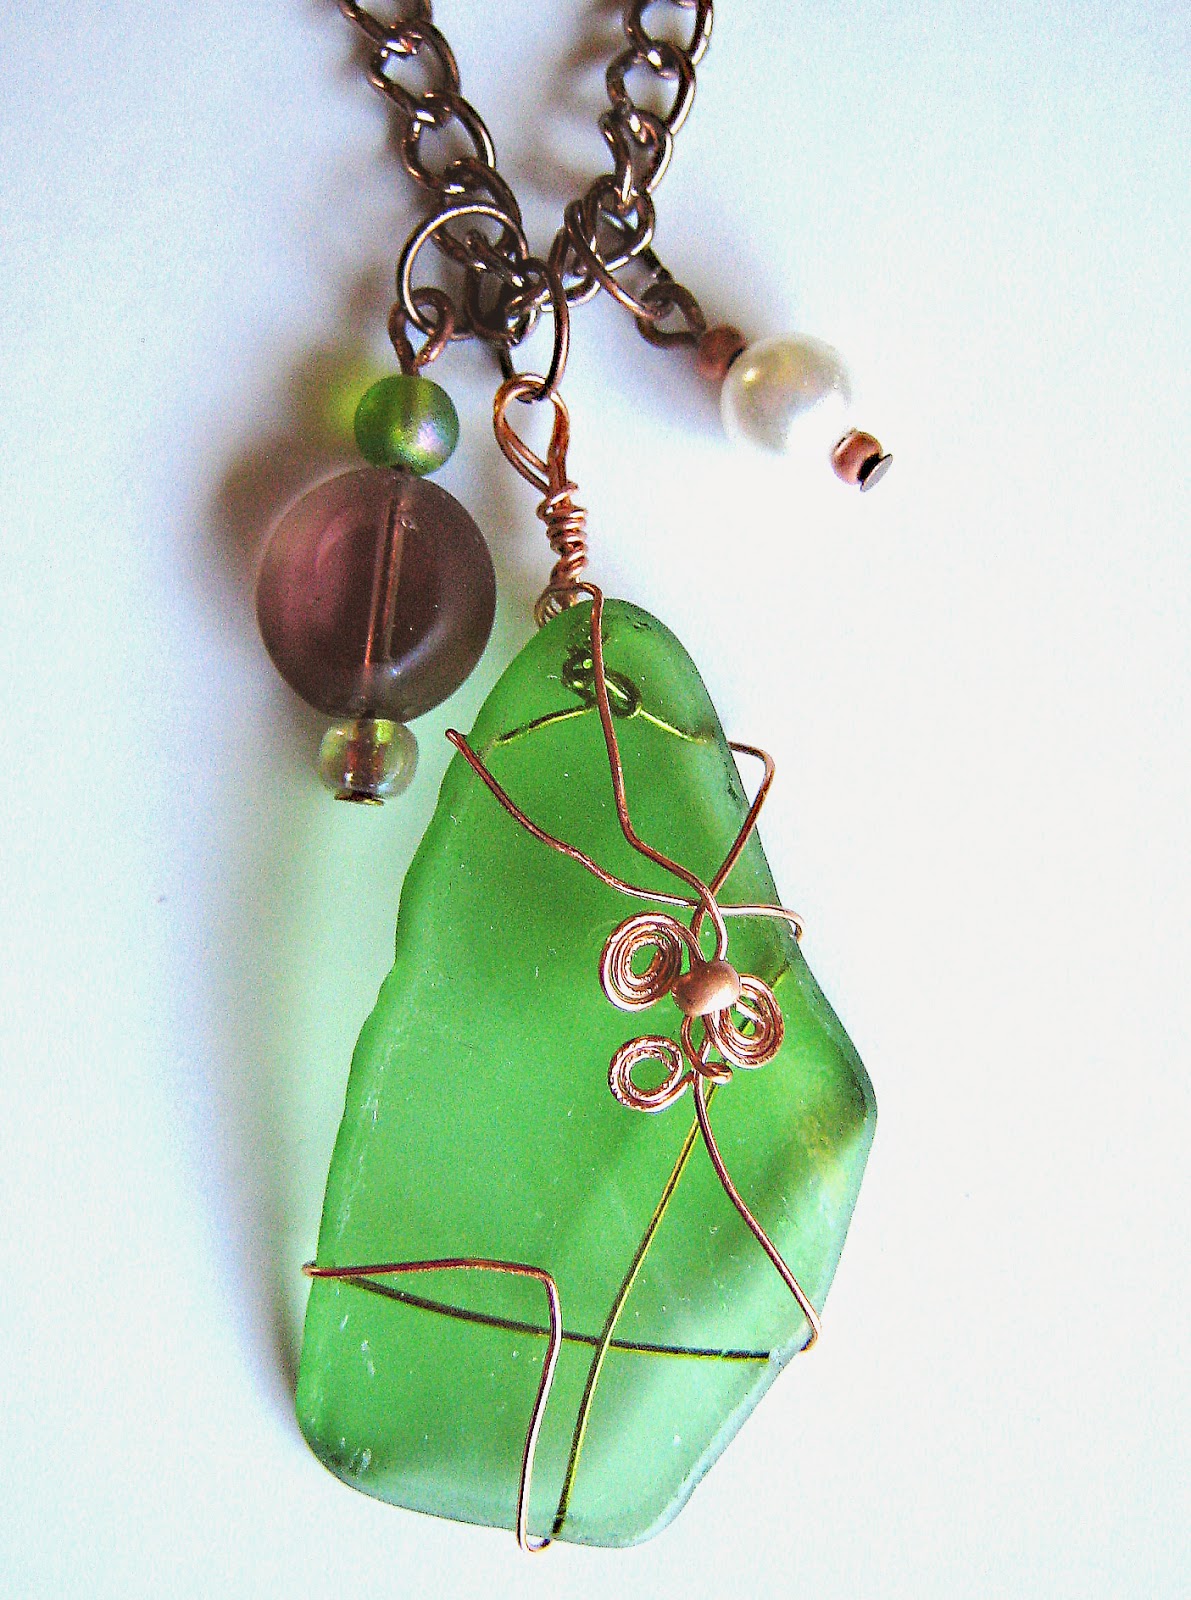
I've got way to many materials to recycle, including all the bottles from the kitchen renovation. I finally used some to make a wire wrapped necklace. I had my husband slice the rim of a beer bottle off and I filed down the edge of a chip from the same bottle for this creation.
Showing posts with label handmade. Show all posts
Wednesday, July 16, 2014
Friday, April 11, 2014
Bobcat Lens Cap Holder
As you may know, my husband is a brilliant photographer & I have linked often to his flickr where he goes by the name Baubcat. He often misplaces his lens cap and a few months back I saw a cap holder on B&H that attaches to the camera strap & the lens cap snaps into it. I was thinking of buying one, but then realized he had multiple lenses with different size caps & I didn’t want to buy a string of holders. I then googled ‘lens cap holder’ & found lots of pouches used to hold them. This brought my mind around to the many animal themed coin purses I’ve faved & pinned. I decided to make one of a BOBCAT. I measured his lens caps to determine the diameter of the holder. I drew a bunch of circles on a scrap of paper & began designing. I wanted to velco it closed, rather than snap so the snap wouldn’t be pressing into the plastic cap. I figured the nose was a good place for that. Then I needed to draw a cutting line somewhere along the middle to open up & insert the cap. I looked at many a photo of bobcats & had planned to make it very simplified & abstract, but when I left out too much detail it either looked like a kitten or a fox. Since bobcats have almost a mane, it was hard deciding whether to fringe the outer edge. You can see a sketch of a few of my various ears, eyes, etc. In the end I decided to do some embroidery, and as I did, I kept adding more, so much for simplified! What do you think; does it look like a bobcat?
Labels:
bobcat,
camera,
cats,
embroidery,
handmade,
lens holder
Wednesday, June 12, 2013
Father's Day Card Handmade
My handmade card for dad for Father's Day. That's an old photo of my big sis & I in his lap probably in 1959.
Labels:
cards,
father's day,
handmade,
paper crafts,
vintage
Sunday, May 13, 2012
Happy Mother’s Day
A day set aside to show our appreciation for all our mother’s
do for us, even after we’ve long ago flown the nest. I know my mother still
looks out for all her 5 kids and now their families too, motherhood never ends.
I usually make the 2½ hour trip to my mom’s to visit
her on Mother’s Day, but with a 9-6 work schedule today that was impossible. I
did find time this week to make her a nice pair of purple (her favorite color) earrings.
She wears quite a lot of purple, but it turned out she didn’t own any purple
earrings, so I made a wise choice there. I also found a sweet little pocket
mirror at Happy Bug Designs on Etsy. She was thrilled with it too.

![]() |
| A lovely picture of Mom in her youth |
Labels:
accessories,
buy handmade,
earrings,
Etsy,
gifts,
handmade,
jewelry,
mothers day
Tuesday, April 24, 2012
Etsy Treasury, Hippie Days are Here Again
I created a new Etsy Treasury today, I've really been slacking off on my Etsy Shop & Blog since starting my part time job in January. But this morning I was inspired to through a treasury together, Hope you like it.
Labels:
accessories,
buy handmade,
clothes,
crochet,
decor,
earrings,
embroidery,
Etsy,
fabric flowers,
feathers,
hairbands,
handmade,
indie arts,
jeans,
jewelry,
patchwork,
pillows,
retro,
treasury,
vintage
Monday, March 19, 2012
ODD DUCK BAZAAR NEXT WEEKEND
The Fabulous Odd Duck Bazaar is coming up next weekend, Saturday March 31, 2012. Although my new job prevents me from either vending or visiting the craft fair this year, I encourage all who have the time to stop by this incredible bazaar. This year the location has moved to Hollywood, Fl and more space is provided 80+ vendors. Some of South Florida's most talented Indie Artist and Crafters will be selling their wares. The venue provides both indoor and outdoor shopping areas, plus live music. Follow the link to preview the creative vendors you will find.
Labels:
art show,
Bazaar,
buy handmade,
craft fair,
craft show,
crafts,
design,
fashion,
florida,
geekery,
gifts,
handmade,
Hollywood Craft Mafia,
indie artists,
indie arts,
Odd Duck Bazaar,
vintage
Monday, February 27, 2012
Featured on Saved By Love
A big Thank You goes out to Saved By Love Creations for featuring my Shag Pillow in their post on 50 Recycled T-shirt projects. It's really wonderful to be included with so many other incredible recycled projects. My favorite among them is the Pink Rosette Purse from Come Together Kids, but all of the projects are wonderful.This post has really upped my traffic, it's so wonderful that everyone is enjoying the pillow. Needless to say, they've been added to my blog roll, give them a visit.
Labels:
blogs,
eco friendly,
handmade,
how-to,
ideas,
pillows,
recycled,
recycling,
repurposed,
throw pillows,
tutorial,
upcycled
Monday, January 2, 2012
PJ’s for Little Cowboys from Vintage Flannel Fabric
A
Happy New Year to everyone. I’m finally back to my neglected blog. Sorry to be
away so long, the last month of the year is always a very hectic time for me.
Anyway
here’s my post on one of my holiday projects:
Since
both my mother and grandmother did so much home sewing we’ve always had piles
of fabric around the house. Some pieces have been in the family as far back as
I can remember. I had this favorite piece of flannel with a cowboy print that I’ve
loved since I was a little tot myself. I figured someday I’d make something for
a son, but I never had any kids.
Then
I realized a few years ago, when my youngest nephew was turning four, that I’d
better do something with the fabric before all the boys were too old to enjoy
it. So I made him a cute pair of PJ’s. I guess I should have gotten my sis to
send me a picture of him in them as I’m sure he’s outgrown them by now.

This
year at Christmas my niece asked for PJ’s for her 19 month old son. I shopped
around and wasn’t very thrilled with most of what I found in the stores. I did
finally find one cute pair and thought I’d use them as a pattern for a second
pair. Low and behold I came across that small remnant of the cowboy flannel (I
save everything). There was enough for a pajama top if I pieced it together. I
also had some knit fabrics in both blue and red, so I asked my husband if he
were 2 years old which color he would like. He said the red. So I made the
bottoms with the red knit and the top from the flannel. Originally I put a stripe
of the red across the front of the shirt where I pieced 2 parts together, but
we both agreed it looked too girly. So I did a quick google search on cowboy
motifs for other ideas to cover the seam and saw the suede fringe. Also in my remnant
piles were some pieces of ultrasuede (can we say hoarder). I cut a strip 1-1/4”
wide and then cut 1/4” fringe along the edge and sewed it down over the seam. Way
more cowboy now!
Thursday, November 10, 2011
Handmade Pillow Covers
I finally finished the pillows I made those covered buttons for. The fabric is from the piles of designer samples my girlfriend gave me which I'm always using for my craft. This was one of the few fabrics that I had large samples of, 4 matching pieces about 20" x 24". After looking at them many times and debating what to make with them, I finally realized they would go well in my own living room. And luckily I had some coordinating brown cotton to make the edges with. I'm so pleased with how they turned out.
Labels:
accessories,
buttons,
decor,
handmade,
pillows
Sunday, October 9, 2011
Halloween 1977
Minnie Mouse Attacked, a photo by b-a-boop on Flickr.
Since this is October, I thought I’d scan my old Halloween Photo Album for something to post. Here are a few photos from way back in college for Fashion Design. I think most of us in class were dressed up, but these two were my best friends, Gloria as the Ghoul, in her handmade costume of gauze fabric and Cheryl as Dolly Dagger, an idea we created from the Jimi Hendrix song. The three of us worked together on her costume. The body suit with the flames was handmade, the boots were spats we made from vinyl and studs that strapped over spike heeled shoes and I think the choker was a dog collar. She had a dagger in her boots and handcuffs chained around her hips. The cape was my grandmas nursing cape which has since gone missing (wish I knew where). I had made the Minnie Mouse hood/ears years before and the red satin skirt was from a box of costume items that had been in our family for years (mom made us many a costume over the years). I just got a ruffley thrift store blouse and a scarf belt to go with it and used some cut off black hose over my arms. I’m pretty sure we all went out partying together that night; it may even have been the year we saw Billy Joel in concert & saw some truly amazing costumes in the audience.
Monday, October 3, 2011
New Treasury, New Team on Etsy
I recently joined the new 'Hollywood Craft Mafia Sidekicks' team on Etsy. It's a newly formed team of crafters in Florida, headed by the great duo who bring us the local Odd Duck Bazaar.
I just created a treasury from team member items in Black since haloween is coming
Saturday, September 17, 2011
Making a Welcome Sign
My younger sister asked me to make her a welcome sign for her front porch. She wanted something that wasn’t too cutesy. Since she’s an avid birder, I decided to work up an idea for a bird on a branch.
First step was to look around the house for materials. I found a scrap of wood trim that was a nice height and a nice small pinecone. The wood piece had a corner that was beat up, but decided it would give the sign a rustic look. I cut a small branch off the scrub pine tree in our front yard, but my husband advised me that it would probably deteriorate quickly. So instead I found another small branch of a denser wood which I knew had been laying around for at least a year (just shows how messy a house I live in). The branch had a really nice curve to it so it was perfect.
Now I just needed a wood bird cutout. I went to both of my local craft stores and to my surprise, neither had a bird. I always seem to come up with ideas that I think the materials will be readily available & it turns out they aren’t. My husband said to buy a piece of balsa wood & he’d cut out the bird. So then I had to sketch up different bird shapes and decide on the shape & size of the birdy. He did a great job cutting it out.
I didn’t want to try to paint it like a real bird, thought an abstract swirl design would be more interesting. I looked for ideas online and in the old letraset catalogue I also used for font ideas. Here’s a photo of my swirl & font ideas.
After choosing the font & pattern for the bird I hand painted them both and sealed it all with polyurethane. I used some craft wire to make some feet for the bird and glued them to the back of the bird, then used a heavier wire for the hanger. Friday, September 16, 2011
Handmade Beauties Gallery
Handmade Beauties, a gallery on Flickr.
A Gallery I just created on flickr of some of my recent fav's from the many craft & handmade groups I belong to.
Labels:
craft groups,
flickr,
gallery,
handmade
Friday, September 9, 2011
Dreamcatcher Necklace
My niece commisioned me to make a necklace for her to give as a gift to one of her best friends. She came over to look through my collection of materials. She said her friend liked African and Tribal looking jewelry. She chose a few different beads for us to work with & then made some mention of feathers. I remebered I had recently recieved some dream catchers in the mail from some charity I'd never heard of. I went & found them & she decided she like them too. Here is the resulting necklace. Her friend loves it.
Wednesday, August 31, 2011
Shag Pillow
Another handmade and upcycled present I recently made. I was inspired by a photo in a book of a denim rug I saw that was similar.
I began with two 14" squares for the front & back of the pillow, cut from a purple tee shirt.
I then cut 12" wide strips from some fleece remnants left over from a top made decades ago. I cut as many as possible from the odd shaped leftovers I had.
I roughly accordion folded the longest strip forming approximately 1" loops to estimate how wide it would end up and didn't think I had enough to cover the whole front. I then cut additional 12" strips from the purple tee shirt.
I started by centering the longest pink strip on one 14" square, leaving 1" of the purple hanging out on each side for the pillow seams. I then sewed a straight seam down the middle.
I folded over a 1" loop and sewed another seam about 1/4" from the first one. I repeated this until I didn't have enough fabric left for another loop.
Since it was knit fabric and going to be stuffed as a pillow, I just eyeballed the loops & seams, some were a bit crooked. If you wanted more precision you could measure & mark each fold & seam.
I then repeated looping the pink on the other half. I trimmed off the remainder of pink strip 1/4" away from the last seam.
I then overlapped a purple strip on top of the pink 1/2" and sewed over the same seam 1/4" from it's edge. Then I continued looping the purple in the same manner. After a few inches of purple loops, I trimmed it off and started another row of pink. As I was working with remnants, some small strips only made a few loops, so I patched pieces together as I had where the pink & purple meet.
I stopped the last loop about 1" from the edge and sewed the strip down to the square with a second seam to keep it from sticking out when sewing the pillow closed.
I thought it would be easier to leave it just with the loops before making it shaggy when sewing the pillow closed. I then placed the other 14" square face down on the loops and sewed the 1" seam around 3 sides of the pillow, sewing as close too the edges of the loops as possible.
I turned it right side out, stuffed in my pillow form & hand sewed the last edge closed.
Then it was time to make the shagging. I just took my scissors and cut the loops approximately every 1/2" (again just eyeballing it) and being careful not to cut completely down to the seams or to slice the base fabric.
And wallah! a cute shaggy pillow out of recycled materials.
I began with two 14" squares for the front & back of the pillow, cut from a purple tee shirt.
I then cut 12" wide strips from some fleece remnants left over from a top made decades ago. I cut as many as possible from the odd shaped leftovers I had.
I roughly accordion folded the longest strip forming approximately 1" loops to estimate how wide it would end up and didn't think I had enough to cover the whole front. I then cut additional 12" strips from the purple tee shirt.
I started by centering the longest pink strip on one 14" square, leaving 1" of the purple hanging out on each side for the pillow seams. I then sewed a straight seam down the middle.
I folded over a 1" loop and sewed another seam about 1/4" from the first one. I repeated this until I didn't have enough fabric left for another loop.
Since it was knit fabric and going to be stuffed as a pillow, I just eyeballed the loops & seams, some were a bit crooked. If you wanted more precision you could measure & mark each fold & seam.
I then repeated looping the pink on the other half. I trimmed off the remainder of pink strip 1/4" away from the last seam.
I then overlapped a purple strip on top of the pink 1/2" and sewed over the same seam 1/4" from it's edge. Then I continued looping the purple in the same manner. After a few inches of purple loops, I trimmed it off and started another row of pink. As I was working with remnants, some small strips only made a few loops, so I patched pieces together as I had where the pink & purple meet.
I stopped the last loop about 1" from the edge and sewed the strip down to the square with a second seam to keep it from sticking out when sewing the pillow closed.
I thought it would be easier to leave it just with the loops before making it shaggy when sewing the pillow closed. I then placed the other 14" square face down on the loops and sewed the 1" seam around 3 sides of the pillow, sewing as close too the edges of the loops as possible.
I turned it right side out, stuffed in my pillow form & hand sewed the last edge closed.
Then it was time to make the shagging. I just took my scissors and cut the loops approximately every 1/2" (again just eyeballing it) and being careful not to cut completely down to the seams or to slice the base fabric.
And wallah! a cute shaggy pillow out of recycled materials.
Sunday, August 7, 2011
Bathroom Window Valance
I finally got around to finishing & hanging my bathroom valance. We renovated the bath over a year ago and a few months later I can across a remnant at Joann’s Fabrics that matched the tile I used to repair the windowsill. I originally planned to make a horn & swag valance, but the pattern showed it was cut on a curve, which didn’t go with the square background on the print. I put it aside for awhile and after passing by the fabric so many times in my craft room, I finally decided to just go with a traditional pleat. It was easy to construct and it really does go perfect with the tile, so I’m glad I finally knocked it off the ‘to do’ list.
Tuesday, August 2, 2011
Miniature Journal Pendants
I’ve been working on these for a few weeks. I was inspired by a metal charm in the shape of a book. I decided to recycle a bunch of junk mail, scrap paper, magazines and clip art from an old letrastat catalog (picked up in thrift store). I’ve never handmade a zine or book before, I figured a mini one would be a good start. The journals only have about 8 pages, depending on how small you can write, you could jot down your favorite words, spell out your loved ones name one page at a time, or paste in mini photos & use it like a locket. Not sure yet if I’ll just be adding ball chains, or making ribbon or chord necklaces, or just listing them as the pendant alone. How would you hang or list them?
Coming up in the jewelry section of The Reformatory.
Sunday, July 31, 2011
Mini Purse Earrings
My latest creation, a birthday gift for a great friend. Took some small scraps of ultra suede and made tiny pouches, gathered the top & crimped on a ribbon end. Then attached some recycle bits of chain for handles. I originally picked out a lighter beige faceted bead for the top, but the shape was too flat, didn’t like it. I needed a more oblong bead. Spent forever trying to locate 2 matching beads the right shape & color, the hazards of working with recycled materials - and of course, I just have tooo much crap!
Possibly planning another pair in blue silk with chains that have some crystal beads on them, they’ll be a bit more dressy.
![]() |
| Just a small sampling of my hordes to sort through |
Labels:
beaded,
birthday,
earrings,
handmade,
mini purse
Wednesday, July 20, 2011
Upcycled Find of the Day
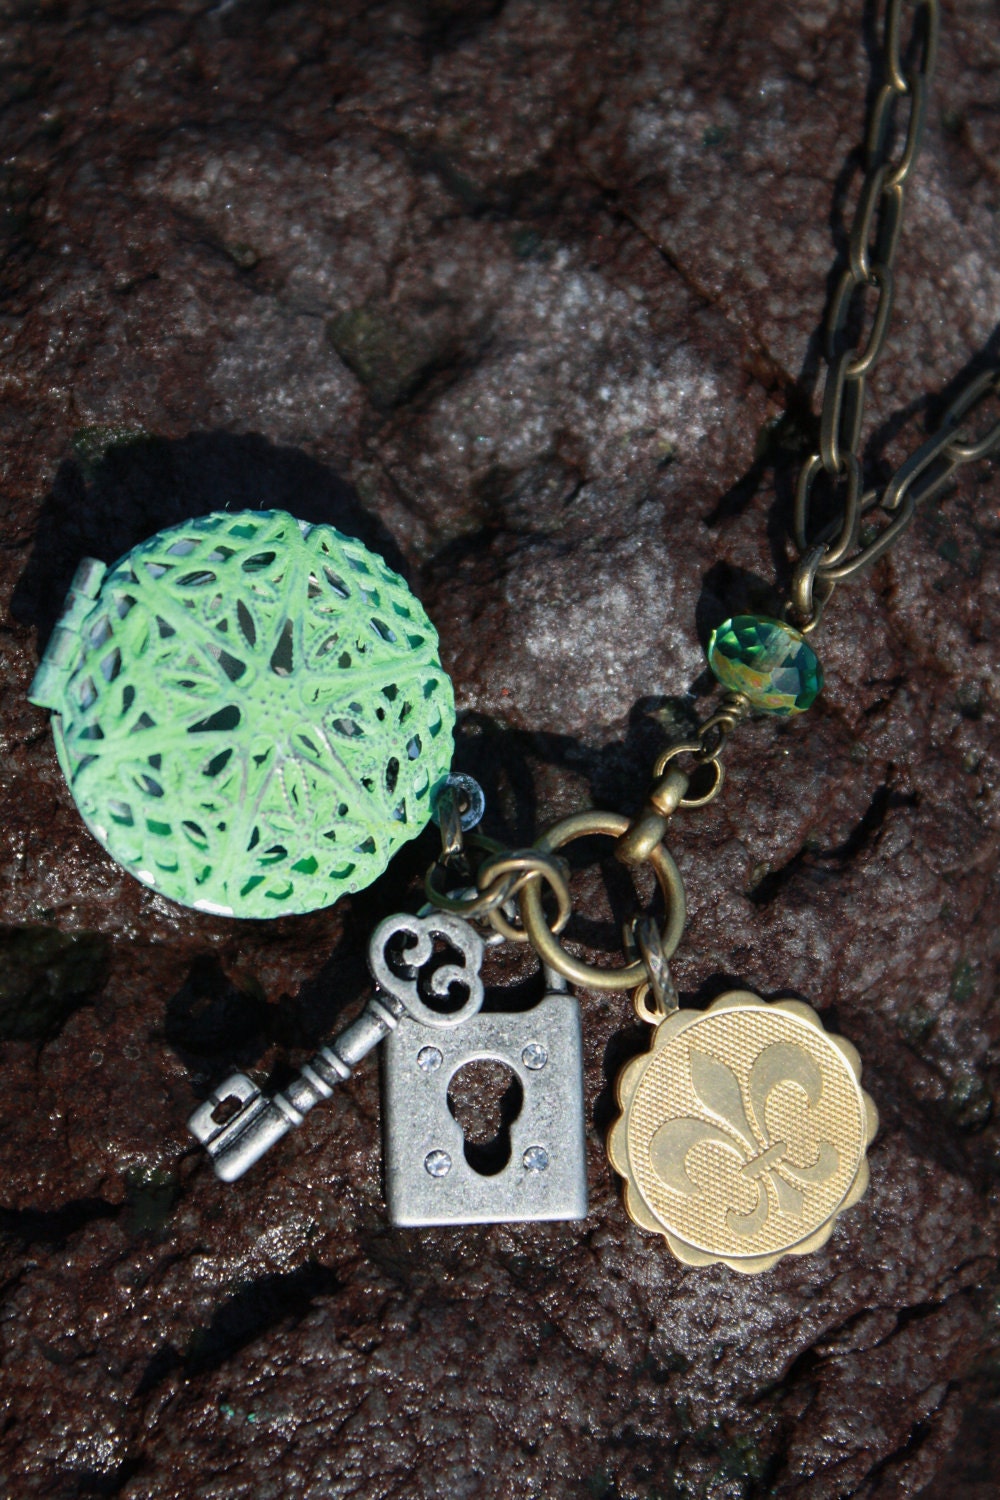
Today on etsy I found this lovely Hidden Treasures Vintage Boho Necklace from tomrass4. A beautiful shop with jewelry upcycled from vintage parts and a french inspiration. I particularly like the way she patinas some of the old metals. Lovely stuff in her shop.
Tuesday, July 12, 2011
Pineapple Pillow
Funny how when it comes to sewing for myself a lot of my projects end up unfinished. I too often get sidetracked by projects for the shops or presents I need to be make. Years ago I made a bunch of pillows for Christmas presents and started two for myself. Well after years of sitting in my unfinished pile, I finally finished off my pineapple pillow. All it needed was the velco sewn in for closing it. Its pillow mate has been hanging out in the livingroom alone all this time since it got finished right away. I’m glad they are finally together.
Subscribe to:
Posts (Atom)