Showing posts with label how-to. Show all posts

Monday, January 14, 2013

Mounting Bottle Bottoms in Wood


Bamboo Finish on box to heighten Brick Wall
Bottle Bottom Template for Valance
Sometimes simple ideas are harder to execute than you expect. My idea of mounting glass bottle bottoms into the wood we used to build-up our brick wall to counter height took days & days of planning & practice to figure out how to accomplish it. 
First of all a lot of beer bottles appear the same size, but they vary ever so slightly. Also since we are using LED lights to shine through from the inside of the box, the bottles need to fit snug in the hole so light doesn’t bleed around the edge. The cleanest way to get a nice round hole in wood without chewing up the edges is with a hole saw. Only problem, they come in just certain sizes & the larger ones get pricey. Between the contractor & ourselves, we had quite a few, but not enough for all the sizes of bottles. We splurged on a few additional ones. My husband also found an adjustable hole maker, but it wasn’t cutting through thick pieces of wood easily. So after various practice holes and shaving down of glass bottles, he decided to use the adjustable hole saw to cut holes in a template, clamp that template to the box and use his router to cut the smooth round holes. So we ended up going out & spending almost $25 on the right router bit. In the end it was worth it.
Bob cutting Circle Templates
Adjustable Hole Saw

Hole Cutters & practice cuts in Bamboo

The Circle Templates
Special Router Bit


Box with Circles Cut Out (protective tape still applied)


Saturday, September 1, 2012

Kitchen Demolition

This is what we’ve learned about how to demolish a kitchen:
Most important is proper safety equipment. Work boots to protect your feet, especially from protruding nails that may end up on the floor. Work glove so you don’t wreck your hands. Eye protection and a large supply of dust masks (as our contract says, you should change these after about an hour because they fill up with small particles faster than you think and then you are really just breathing the dust through the mask). We also had a heap filter to suck up some of the dust.
To begin, remove the appliances, disconnect the sink & if necessary use some shark caps to cap the supply lines. Cover the drain pipe end, so sewer fumes don’t come back up the pipe. Also switch off the breakers and remove the cover plates, outlets and light switches. If you wish to leave one or more outlets for use of power tools, etc. tape around the wire connections & shove them back in the outlet box. Next finish wrapping the room openings in plastic (we wrapped a plastic corridor from the entrance to the front door to carry out the debris and covered the hallway floor to protect it).
Now you’re ready for the fun part (the stronger you are the better) I’m a real lightweight, just the weight of a hammer is a lot for me, so I felt more like a useless observer alongside my husband & the 2 pro’s working on this job, but I got right in there & helped where I could. First step, rip out the countertops, sink and backsplash, our rotten old formica we just pried off in broken sections as needed. Then take out the base cabinets. We had to smash up one in place because the gas line for the stove came up through the bottom of it. Then remove the screws holding the upper cabinets to the walls and any screws through the sides holding them together. If you’re lucky and they aren’t glued to the walls & come off unbroken and if still in usable condition you can recycle them. We are donating our upper cabinets to the Re-Store. If not in good condition, take them outside and smash them apart to make room in the dumpster. Our old kitchens had a soffit above the cabinets on two walls that we were removing, we were surprised to find some huge holes on the under sides of it. To keep from wrecking the ceiling too much, use a utility blade to score along the seam at the ceiling, the joint at the walls and any corner joints. If possible figure out where any electrical wires or other line such as plumbing or other utilities are running behind the soffit and try to avoid them. Take a heavy duty claw hammer and smash through the drywall or plaster & try to knock out a piece. As you work, keep checking for utilities so you don’t damage anything along the way. As you work, used a chisel where needed to keep a clean line along the ceiling seam or adjacent walls you plan to leave in place. After the wall surface is removed, then use the hammer and/or screwdrivers to remove the furring strips that held on the drywall. Now you’re ready to take down the walls. If you can tell from the opening where you removed the soffit where the wall studs are its helpful, otherwise tap with the hammer or if you have metal studs try a stud finder. Then take the claw end of the hammer and smash a hole next to the stud. Try not to thrust too hard as you don’t want to break through any wall surface on the other side. Also, again try to be aware of where your electrical wires & utilities are behind the wall and work carefully around them. Keep clawing holes in a line next to the stud and then wrap that claw behind it and rip out chunks of wall. Remember to use your utility blade to score along seams at joints where you are keeping the adjacent wall. The cleaner the line you can make at the joints the better. After all the wall board is removed go back and remove all the nails or screws from the studs. All that debris gets bagged up or dumped in a wheelbarrow and hauled out to the dumpster. When all the big stuff is gone, sweep and shop vac and admire your hard work, you should be completely spent. If you have that hepa filter keep it running to collect more dust. Our next step was to remove the floor, but I’ll save that for another post.


Friday, July 6, 2012

Hilarious "How to" for installing hinges

When we renovate the kitchen we will be installing all new cabinets and one of the cabinets I was considering mentioned 'clip on' door hinges. I wasn't quite sure what that meant (apparently it's just a reference to the two sides of the hinge clipping together). Anyway while doing a search to find out, I came across this post on Garden Web describing how to install euro-hinges that just had me in stitches. I can just imagine every aspect of the kitchen renovation going this way. LOL.

Monday, February 27, 2012

Featured on Saved By Love

A big Thank You goes out to Saved By Love Creations for featuring my Shag Pillow in their post on 50 Recycled T-shirt projects. It's really wonderful to be included with so many other incredible recycled projects. My favorite among them is the Pink Rosette Purse from Come Together Kids, but all of the projects are wonderful.This post has really upped my traffic, it's so wonderful that everyone is enjoying the pillow. Needless to say, they've been added to my blog roll, give them a visit.

Wednesday, October 26, 2011

A Tutorial on Covering Old Shank Buttons


I’m making some pillows for my sofa and needed some large buttons for them. I didn’t find any in my collection whose color satisfied me, but I did find 2 rusty old metal buttons and 2 very plain black plastic ones. I decided to look for fabric to cover them. The piece I found was a ribbed knit (the kind used for neck bands on t-shirts). A woven fabric would probably work better for this project as it won’t stretch around the button as easily, but I found that mine came out well enough to use for my project.
I know it’s easier to just buy a covered button kit, but I hate having to spend money on something new when I have so much stuff that needs to be used up here at home.


Here’s a how-to:

Step 1)
Choose a shank button and cut a circle of fabric about 1/2” to 5/8” larger in diameter than your button.
Step 2)
Sew a tight running stitch around the outside edge of your fabric circle.
Step 3)
Place the button upside down on the wrong side of fabric and pull your thread so that the fabric gathers tight around the button. Securely knot off the thread.
Step 4)
Cut a circle of felt or lightweight pellon smaller than the button but large enough to cover the raw edged on the fabric on the back of button. Cut a slice in the center for the button shank.
Step 5)
Run a circle of glue (I used Ilene’s Ok to wash it) around the stitching. Place the felt on top and press firmly down and secure with some clothespins until dry. I placed a piece of plastic wrap on top so any glue that seeped out wouldn’t stick to the clothespins.

As you can see in the photos, it worked a bit better on the 2 black plastic buttons because they had a recess on the back, but the metal ones are still usable.

Sunday, October 23, 2011

Halloween Decor Roundup

Here are some recent finds I've come across for Great Halloween Decorations.

Ric Rac Pumpkins at Eddie Ross


Bat Wreath at Did someone say party?


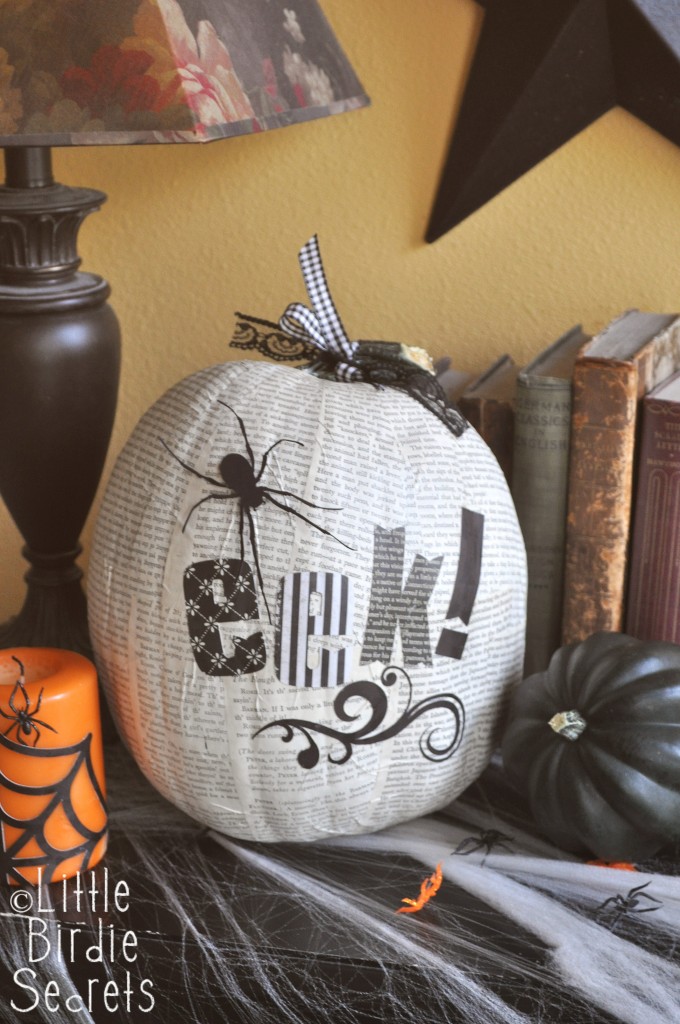
Decoupage Pumpkins at Makes and Takes

Framed Pumpkins at Indie Pretty Projects

Wednesday, November 4, 2009

Rebecca’s eBook


My friend Rebecca wrote a nice little eBook on how to make a Princess Choker. It’s available to download for just $5.00. I saw the choker and it’s so lovely. She also has lots of other great stuff in her Etsy store, Moonwise Jewerly.

LinkWithin

Related Posts Plugin for WordPress, Blogger...