Showing posts with label green building. Show all posts
Sunday, July 21, 2013
Kitchen Before and After
I've definitely neglected my blog since returning to work in the engineering field. The kitchen was completed months ago, but I hadn't taken time to get my husband to snap some nice photos. Finally made time for that, in between work & using my days off to painting & reorganizing the other rooms in the house after the re-wiring job. I put together some before & after shots so you can see what a big improvement the new kitchen is.
Happy to see go: wallpapered ceiling, vinyl floor, old hardware on cabinets.
Favorite new additions: recycled glass countertops (vetrazzo), DSC range, bosch dishwasher (nice & quiet), new bar/counter & window valance made with the glass bottle bottoms & LED lights. Eco friendly marmoleum floor and bamboo cabinets with a tall pantry.
Saturday, December 22, 2012
Alehouse Amber Counter Top
Today the counter top fabricator came to make the template for our recycled glass counter tops. Later in the day we drove up to his shop to inspect the two slabs that will be used.
I love these Vetrazzo counter tops even more now that I've seen the full slabs. The small sample pieces or online photos just don't do it justice. Certain pieces of the glass chips have so much sparkle & add such depth. I can't wait for them to be installed in a few weeks...so glad I splurged on my eco friendly counters.
![]() |
| Alehouse Amber by Vetrazzo |
Wednesday, December 19, 2012
Installing Kitchen Cabinets
Those beautiful Bamboo cabinets are finally getting installed. At first it was a bit of a shock seeing the large open room & my new floor getting covered over by the cabinet carcasses. Made the room start feeling crowded. But after enough of them got placed, the design started to come together and I'm getting psyched. Can't wait till the doors & handles get put on.
The installation videos make it seem like a quick easy job, but to do a quality job, it takes a lot of leveling, shimming and interconnecting of the cabinets. It didn't go quite as quick as even my contractor expected, probably because he's as much of a perfectionist as I am...and of course his helpers are us amateurs & he's always taking time explaining every step to us. So far it's looking great!
Wednesday, November 7, 2012
Bamboo Cabinets Ready for Assembly
The beautiful bamboo kitchen cabinets have finally arrived. They are now stacked up in two rooms in the house waiting for us to finish the walls & floor so we can assemble them and install them.
Thursday, September 13, 2012
Wednesday, August 22, 2012
New Kitchen Coming Soon!
Out with the old, in with the new! Finally, we have our permit and the dumpster was delivered today, so demolition of the old kitchen will start next week. It's been a busy few days getting materials ordered and of course I'm still trying to get furniture & stuff moved away from the walls for the whole house rewiring. It's amazing how many little details need to be coordinated, making sure materials will arrive when needed, but also not having too many things taking up room inside when we need to knock out walls and move debris out of the house. It's going to be a crazy month. Hope to post lots of pictures along the way.
Friday, January 14, 2011
When it comes to Kitchens, It’s Not Easy Being Green
…at least not if you’re trying to be affordable. When we began planning our new kitchen, we hoped to build green. We wanted energy efficient appliances, cabinets from sustainable materials with low VOC glues & finishes, recycled countertops, green flooring. Well that’s all well & good if you’re a Rockerfeller.
Most of the kitchen sites we looked at say it’s not a whole lot more to buy green cabinets. What they mean to say is it’s not that much more than ordering custom cabinets.
We wanted to get bamboo cabinets, most of what we found was only available out west, California, Oregon, etc. Not many made here in south Florida unless you buy custom made. We were quoted around $10K for just the cabinets. That’s about half of our whole kitchen budget. There are RTA bamboo cabinets available online that are in our price range. Although most are built with plywood cores, which are better quality, there’s no telling how bad the VOC’s in the plywood or the glue attaching the veneers are.
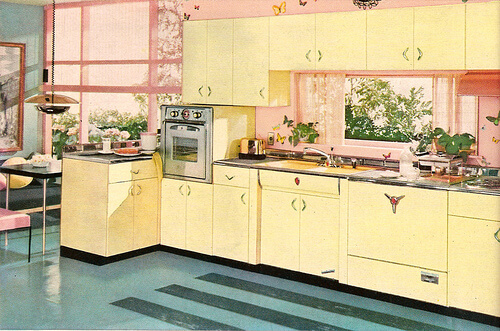
Then I came across the retro renovations blog and started looking at vintage metal cabinets, Youngstown, Geneva, etc. I was immediately drawn to the vintage look for our 1947 built home. But again, Florida was the problem. To find these vintage cabinets you need to go to the northeast or midwest states. Then you have to find pieces that fit your layout and most likely have them repainted.
I spent months drooling over listings for these wonderful old cabinets and then came across a story on their blog a women posted about her renovation. It cost her $5K for her cabinets after purchase, transporting & refinishing & she lived about 20 miles from where she found them. Plus it was only one wall of cabinets. I decided it would be too much to pursue the vintage cabinets. St. Charles has started re-manufacturing their metal cabinets, but I can tell by looking at them they are most likely out of my price range too. I emailed our closest dealer but never got a reply.
So I have been keeping my eyes out in the classifieds for used cabinets. They may not be built green originally, but recycling would make them green. But so far I haven’t found any that I can use yet.
Most likely we’ll be getting RTA cabinets, perhaps bamboo, perhaps somewhat green. It does appear since California passed a law pertaining to the VOC’s in plywood, that most of the plywood used today is meeting their standard, so that’s a plus I hope.Tuesday, October 12, 2010
The Yellow Green Farmers Market is here
After months of delay, the Yellow Green Farmer’s Market opened in Hollywood. It’s an open-air market featuring local produce, gourmet foods, tee-shirt shops, arts and craft booths and health and beauty items for green living. With space for over 300 vendors it’s a much-needed fresh green market for South Florida. I’m hoping it’s very successful. It’s open Thursday nights, Saturday and Sunday. Check it out.
Thursday, February 18, 2010
The Kitchen Project
Well I’ve been running around to local places trying to find bamboo cabinets. Only found one place that had them on display. I’ve also been looking at flooring & found some interesting cork & rubber floors, have to find out more about them & the cost. Finding a few places that can order the recycled glass countertops, but they are way expensive. So far I don’t think I can afford the green kitchen I really want, but I’ll keep plugging away. Here’s an ugly before pic and a possible layout I created with a free design tool on Lowes website.
Monday, July 20, 2009
Renovation Existing Tile
When renovating a bathroom, most home improvement sites and books will recommend completely ripping out all the fixtures and tiles and updating everything. They say that you will usually recover the cost when you resell the house. That’s fine if you can actually afford the thousands of dollars in demolition and replacement. Many of us don’t have those resources. And with the current housing slump and home values having dropped dramatically, sinking thousands into a renovation may not pay off.
I have updated both the bathrooms in my home without replacing all of the tile. I have redone just portions of it. I did it myself, and it does involve some delicate precision and hard labor. I’m not sure tile contractors would like my approach either. Hiring someone to do this work may not be easy as they most likely feel it’s easier to tear it all out and then cover a clean flat wall.
Easy doesn’t always mean best for the environment. My approach is to preserve as much vintage tile as possible and to add as little as possible to the waste stream. Where does all that old tile end up? Probably a landfill. Maybe if it were being recycled for some other use, it wouldn’t bother me so much, but most of the time, you see large amounts of construction waste just packed up into dumpsters and trucked away.
Here’s what I did with the 1st renovation. We had broken tile on the windowsill, some edge tiles at the floor that were cracked, a broken ceramic wall mounted towel rack and worn out ceramic soap dish and toothbrush holders above the wall hung sink. After removing the sink, we also found holes through some tiles and cracks in others.
I loved the 50-year-old tan speckled tile but knew I probably wouldn’t be able to match it. The room had black edge tile, so I had to come up with a pattern to insert black tile to fill in the spaces where I removed the broken stuff. It required placing black tiles where the new towel bars would attach to the walls, black tiles on the new windowsill and a few rows of black behind the sink. It also involved preserving at least one tan tile to fill in a spot where one towel bar was removed. Getting tiles off in one piece is the trickiest part & mostly comes down to luck.
Here’s a few links on how to replace a broken tile…
http://www.thisoldhouse.com/toh/how-to/intro/0,,20051584,00.html
http://www.ehow.com/how_114958_replace-cracked-tile.html
perhaps I’ll post more about my own repair work at a later date as this is already getting too long winded.
I have updated both the bathrooms in my home without replacing all of the tile. I have redone just portions of it. I did it myself, and it does involve some delicate precision and hard labor. I’m not sure tile contractors would like my approach either. Hiring someone to do this work may not be easy as they most likely feel it’s easier to tear it all out and then cover a clean flat wall.
Easy doesn’t always mean best for the environment. My approach is to preserve as much vintage tile as possible and to add as little as possible to the waste stream. Where does all that old tile end up? Probably a landfill. Maybe if it were being recycled for some other use, it wouldn’t bother me so much, but most of the time, you see large amounts of construction waste just packed up into dumpsters and trucked away.
Here’s what I did with the 1st renovation. We had broken tile on the windowsill, some edge tiles at the floor that were cracked, a broken ceramic wall mounted towel rack and worn out ceramic soap dish and toothbrush holders above the wall hung sink. After removing the sink, we also found holes through some tiles and cracks in others.
I loved the 50-year-old tan speckled tile but knew I probably wouldn’t be able to match it. The room had black edge tile, so I had to come up with a pattern to insert black tile to fill in the spaces where I removed the broken stuff. It required placing black tiles where the new towel bars would attach to the walls, black tiles on the new windowsill and a few rows of black behind the sink. It also involved preserving at least one tan tile to fill in a spot where one towel bar was removed. Getting tiles off in one piece is the trickiest part & mostly comes down to luck.
Here’s a few links on how to replace a broken tile…
http://www.thisoldhouse.com/toh/how-to/intro/0,,20051584,00.html
http://www.ehow.com/how_114958_replace-cracked-tile.html
perhaps I’ll post more about my own repair work at a later date as this is already getting too long winded.
Subscribe to:
Posts (Atom)